- 浏览: 73067 次
- 性别:

- 来自: 北京
-

最近访客 更多访客>>
文章分类
- 全部博客 (86)
- Java_Develop (6)
- Develop about Android (11)
- Develop about C (3)
- Develop about C++ (13)
- Develop about Objective-C (8)
- Develop about XML&DOM4J (6)
- Develop about JSP (7)
- Develop about Servlet (14)
- develop about MySql (4)
- Develop about Java_Socket (1)
- Develop about Java_Thread (4)
- Develop about IOS (8)
最新评论
-
eric_weitm:
在效率本身上而言,引用也有优势。另外,在编译器实现时,指针的传 ...
C++中的 引用和指针区别
Android开发——布局详解(上)
在昨天的学习中,我们动手实现了第一个Android程序:手机拨号程序。今天学习的是关于布局(Layout),让我想起了之前学过的HTML布局和在JFrame中学习的布局方式(GUI):BorderLayout、FloowLayout、GridbagLayout等等。
Android的布局方式和以前学习的布局方式如出一辙。Android的布局方式分为四种:
1.LinearLayout(线性布局)
2.RelativeLayout(相对布局)
3.TableLayout(表格布局)
4.AbsoluteLayout(绝对布局)【暂时没讲】
下面分别介绍一下各种布局方式:
线性布局,就是在该标签下的所有子元素会根据其orientation属性的值来决定是按行还是按列逐个显示。
小总结:orientation有两个属性值:一个是按列的“vertical”,一个是按行布局的“horizontal”;
写一个线性布局的实例:
Main.xml
<?xml version="1.0"encoding="utf-8"?>
<LinearLayoutxmlns:android="http://schemas.android.com/apk/res/android"
android:layout_width="fill_parent"
android:layout_height="fill_parent"
android:orientation="vertical" >
<TextView
android:layout_width="fill_parent"
android:layout_height="wrap_content"
android:text="@string/name_text" />
<EditView
android:layout_width="fill_parent"
android:layout_height="wrap_content"
android:id="@+id/EditView"
/>
<Button
android:layout_width="wrap_content"
android:layout_height="wrap_content"
android:text="@string/ok_text"
android:layout_aglin/>
</LinearLayout>
如上是整个LinearLayout布局文件,我们可以看到布局文件是XML格式的,命名空间:Android指向网络上的一个文件,意味着书写所有属性的时候都需要以“Android”开头;
Android:layout_width和Android:layout_height这两个属性是用来设置组件元素的宽和高,无论用哪种布局方式,这些属性都是通用的;这两个属性有三个值:
a)值一:Fill_parent,代表填满元素,对于顶级元素来说,父级元素就是手机屏幕了。
b)值二:wrap_content,代表元素的大小仅包裹自身内容,数字代表占用相应的px值。
c)值三:match_parent,也就是我们以前设置的数字大小,自定义组建的宽高,单位是dp(最好使用dp,当然也可以使用px【查的资料上这么说】)
然后说一下实例中的三种常见组建:<TextView>,就是标签组件,我觉得就是类似于HTML中的表单属性一样,只不过Android中把组件中的属性都写在了自己的元素集合中,例如:

在这里文本组件中,我们定义了组建的宽高和属性值,定义了静态内部类id中名为EditView的唯一标识符,属性值的定义后面再复习。
第二种组件是:<EditView>,文本组件,相当于HTML写表单的<input type=”text”>一样,用来输入内容的组件。
第三种组件是:<Button>,按钮组件。
线性布局文件的根元素是:<LinearLayout>
接着说一下string.xml文件内容的读取
当我们在string.xml文件中写好了所有的文本和数值内容后,我们需要在使用组件的时候把这些值赋给组件的属性,例如:
<TextView
Android:text=”@string/name”
/>
如上代码所示,赋值的格式为这样的,”@”是固定格式,后面是值所在的文件名,“/”后面是string.xml文件中对应的“name”的值。
最后简单写一个表单实例:
String.xml文件:
<?xml version="1.0"encoding="utf-8"?>
<resources>
<stringname="system">页面布局作业</string>
<stringname="user">用户名:</string>
<stringname="pass">密码:</string>
<stringname="ok">登录</string>
<stringname="cancle">取消</string>
</resources>
<!—一共是五条文本属性-->
布局文件main.xml:
<?xml version="1.0"encoding="utf-8"?>
<LinearLayoutxmlns:android="http://schemas.android.com/apk/res/android"
android:layout_width="fill_parent"
android:layout_height="wrap_content"
android:orientation="vertical" >
<TextView
android:layout_width="fill_parent"
android:layout_height="wrap_content"
android:layout_gravity="center"
android:text="@string/system"
/>
<TextView
android:layout_width="wrap_content"
android:layout_height="wrap_content"
android:text="@string/user"
android:id="@+id/user_text"
android:layout_alignParentLeft="true"
/>
<EditText
android:layout_width="fill_parent"
android:layout_height="wrap_content"
android:id="@+id/text1"
android:layout_toRightOf="@id/user_text"
/>
<TextView
android:layout_width="wrap_content"
android:layout_height="wrap_content"
android:text="@string/pass"
android:id="@+id/pass_text2"
android:layout_alignParentLeft="true"
/>
<EditText
android:layout_width="fill_parent"
android:layout_height="wrap_content"
android:id="@+id/text2"
android:layout_toRightOf="@id/pass_text2"
/>
<Button
android:id="@+id/cancle_button"
android:layout_width="wrap_content"
android:layout_height="wrap_content"
android:text="@string/cancle"
android:layout_alignParentRight="true"
/>
<Button
android:id="@+id/ok_button"
android:layout_width="wrap_content"
android:layout_height="wrap_content"
android:text="@string/ok"
android:layout_toLeftOf="@id/cancle_button"
/>
</LinearLayout>
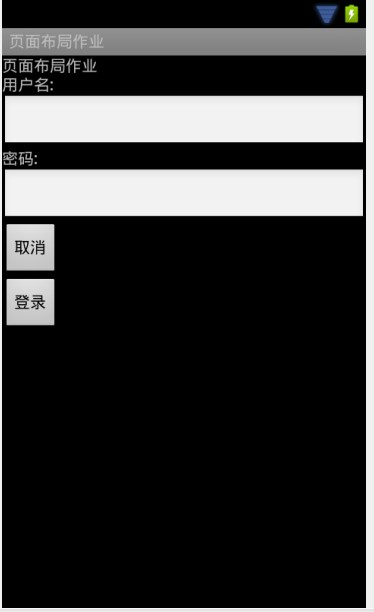
在布局文件中,我写了一个登录的表单,实现后的效果如图:
================================================================
线性布局就说这么多,下面说一下相对布局方式。
相对布局中的视图组件是按相互之间的相对位置来确定的,并不是线性布局中的必须按行或按列单个显示。我觉得相对布局比线性布局唯一好的一点是:能够在一行内显示多个组件,不像线性布局只能按行或列排列不同组件且每行都只能有一个组件。
相对布局方式的根元素为:<RelativeLayout>,同线性布局一样,也是XML文件,命名空间也是:Android;在不同组件排列的时候,提供了多种方式,比如:
Android:layout_below=”@id/text”:将该元素放到id为text的元素的下面
Android:layout_toLeftOf=”@id/ok”:放到id为ok的元素左边
android:layout_alignParentRight="true"把该元素放到最右端
在写今天作业的时候,要求“登录”和“取消”这两个Button按钮居中排列,我就是使用:
<Button
Android:layout_alignParentRight=”true”
Android:id=”@+id/cancle”/>
<Button
Android:layout_toLeftOf=”@id/cancle/>
通过如上代码,先把“取消”这个按钮放到最右边,再让“登录”按钮排列到“取消”按钮的左边,实现它们的正确排列。
Android:gravity="center"设置文本的对齐方式(图中为居中)
Android:layout_alignTop=”@id/ok”:对齐id为ok的元素的顶部 android:layout_alignBaseline="@+id/cancel_button"该元素文本值对准基线
padding属性指定视图与视图内容之间的内边距——今天遇到<TextView>元素的值与<EditView>元素的边框之间有很大的距离无法紧靠,现在指出是因为padding的边距不为0px导致的。
=============================================
相对布局提供了很多对齐方式,详细的可以查一下API。常用的方式是线性布局和相对布局的嵌套,只要正确添加根标签就可以实现。
下面用线性布局方式中的实例通过嵌套实现登录表单:
<?xmlversion="1.0" encoding="utf-8"?>
<LinearLayoutxmlns:android="http://schemas.android.com/apk/res/android"
android:layout_width="fill_parent"
android:layout_height="wrap_content"
android:orientation="vertical" >
<TextView
android:layout_width="fill_parent"
android:layout_height="wrap_content"
android:layout_gravity="center"
android:text="@string/system"
/>
<!-- 使用绝对定位对齐用户框 -->
<RelativeLayout
android:layout_width="wrap_content"
android:layout_height="wrap_content"
>
<TextView
android:layout_width="wrap_content"
android:layout_height="wrap_content"
android:text="@string/user"
android:id="@+id/user_text"
android:layout_alignParentLeft="true"
/>
<EditText
android:layout_width="fill_parent"
android:layout_height="wrap_content"
android:id="@+id/text1"
android:layout_toRightOf="@id/user_text"
/>
</RelativeLayout>
<!-- 使用绝对定位对齐密码框 -->
<RelativeLayout
android:layout_width="wrap_content"
android:layout_height="wrap_content"
>
<TextView
android:layout_width="wrap_content"
android:layout_height="wrap_content"
android:text="@string/pass"
android:id="@+id/pass_text2"
android:layout_alignParentLeft="true"
/>
<EditText
android:layout_width="fill_parent"
android:layout_height="wrap_content"
android:id="@+id/text2"
android:layout_toRightOf="@id/pass_text2"
/>
</RelativeLayout>
<!-- 使用绝对定位对齐Button按钮 -->
<RelativeLayout
android:layout_width="wrap_content"
android:layout_height="wrap_content"
>
<Button
android:id="@+id/cancle_button"
android:layout_width="wrap_content"
android:layout_height="wrap_content"
android:text="@string/cancle"
android:layout_alignParentRight="true"
/>
<Button
android:id="@+id/ok_button"
android:layout_width="wrap_content"
android:layout_height="wrap_content"
android:text="@string/ok"
android:layout_toLeftOf="@id/cancle_button"
/>
</RelativeLayout>
</LinearLayout>
接着讲一下今天学的最后一个布局方式<TableLayout>表格布局
我觉得表格布局可以较好的实现多数常见的布局方式,今天在用表格布局方式写登录表单的时候发现,同一列的组件宽高都是统一的,不能更改,也就是说同一列的组件不能有大小不等的组件(个人意见可能不实),这是表格布局的一个缺陷吧,不过我觉得可以利用多种布局方式进行嵌套解决这个问题,比如表格布局中的一个单元格里嵌套相对布局或者其他的布局方式。
说一下表格布局方式的格式:根元素为:<TableLayout>,行元素标签为<TableRow>,没有列标签,也就是说在一行中可以添加不同的组件,有几个组件就是几列。
用表格布局方式实现登录表单的实例:
<?xml version="1.0"encoding="utf-8"?>
<TableLayoutxmlns:android="http://schemas.android.com/apk/res/android"
android:layout_width="match_parent"
android:layout_height="match_parent" >
<TableRow>
<TextView
android:layout_width="fill_parent"
android:layout_height="wrap_content"
android:text="@string/system"
android:gravity="center"
android:textSize="20dip"/>
</TableRow>
<TableRow>
<TextView
android:id="@+id/user_text1"
android:layout_width="50dp"
android:layout_height="fill_parent"
android:text="@string/user"
android:textSize="20dp" />
<EditText
android:layout_width="130dp"
android:layout_height="40dp"
android:id="@+id/text1"
/>
</TableRow>
<TableRow>
<TextView
android:id="@+id/pass_text2"
android:layout_width="50dp"
android:layout_height="fill_parent"
android:text="@string/pass"
android:textSize="20dp" />
<EditText
android:layout_width="130dp"
android:layout_height="40dp"
android:id="@+id/text2"
/>
</TableRow>
<TableRow
android:gravity="center">
<Button
android:id="@+id/ok_button"
android:layout_width="wrap_content"
android:layout_height="wrap_content"
android:text="@string/ok"
android:textSize="15dp"
/>
<Button
android:id="@+id/cancle_button"
android:layout_width="wrap_content"
android:layout_height="wrap_content"
android:text="@string/cancle"
android:textSize="15dp"
/>
</TableRow>
</TableLayout>
上述代码的宽高有的用了尺寸定义的。一共是写了一个四行两列的表格,其中第一行是项目名,第二、三行由<TextView><EditView>这两个元素组件组成,实现用户名和密码的输入;最后一行放了两个<Button>元素组件。
表单根目录有一个Android:stretchColumns=“0,1,2,3”属性,这个属性
指定每行都由第“0,1,2,3”列占满空白空间。
最后一种布局方式是:绝对布局,今天没有讲,所以留到明天总结。


发表评论

-
Android开发——概述及环境搭建
2011-12-05 21:25 636今天开始学习安卓手机软件开发,首先介绍一下Android: ... -
Android开发之:第一个应用程序及工程文件及结构详解
2011-12-06 17:10 780Android开发之:第一个应用程序及工程文件及结构详解 ... -
Android开发——手机拨号程序实现
2011-12-06 19:50 927在上一篇文章中,我们实现了第一个程序:helloWorld,并 ... -
Android开发——关于onCreate的解读
2011-12-06 20:34 824当我们创建好一个Android项目后,打开src下的java ... -
多种方式实现Android页面布局的切换
2011-12-08 18:07 1431多种方式实现页面切换 今天老师留的作业如题,要求用三种方 ... -
Android开发——Android生命周期
2011-12-10 20:11 606Activity的三种状态: ... -
Android开发——菜单小问题解决
2011-12-12 20:47 787在写菜单项的时候发现一个不知道的知识点,问题是这样产生的。写好 ... -
Android开发——UI组件详解及注册提交表单实现
2011-12-13 21:44 806今天讲解的内容是UI组件的TextView组件和EditVie ... -
Android开发——跟随手指的小球实现
2012-01-11 14:13 847今天要实现的是一个跟随手指的小球,说白了就是让小球按着手指滑动 ... -
Android开发——实现点击图片切换效果
2012-01-11 14:15 934在资源中添加5张图片,重命名为a-e。 实现java代码如下 ...
相关推荐
Android布局详解实例,包含:线性布局(LinearLayout)、相对布局(RelativeLayout)、帧布局(FrameLayout)、表格布局(TableLayout)四大布局方式的demo
《Android应用开发详解》 作者:郭宏志 编著 内容简介 本书分为三个部分,包括基础篇、技术篇和应用篇。由浅入深地讲述了Android应用开发的方方面面。 第一篇 基础篇 第1章 Android概述 Android概述,讲述了...
2.3 创建第一个Android项目——HeUoAndroid 2.3.1 创建HelloAndroid项目 2.3.2 运行HelloAndroid及模拟器的使用 2.3.3 调试HelloAndroid 2.4 小结 第二部分 基础篇 第3章 Android程序设计基础 3.1 Android程序框架 ...
《Android核心技术与实例详解》涵盖的主要内容Aridroid开发起步,Android布局管理器,Android常用高级控件,游戏与3D应用程序开发,网络与数据处理,手机特有Feature开发,传感器应用的开发,Android游戏开发实践...
《Android核心技术与实例详解》涵盖的主要内容Aridroid开发起步,Android布局管理器,Android常用高级控件,游戏与3D应用程序开发,网络与数据处理,手机特有Feature开发,传感器应用的开发,Android游戏开发实践...
《Android核心技术与实例详解》涵盖的主要内容Aridroid开发起步,Android布局管理器,Android常用高级控件,游戏与3D应用程序开发,网络与数据处理,手机特有Feature开发,传感器应用的开发,Android游戏开发实践...
《Android核心技术与实例详解》涵盖的主要内容Aridroid开发起步,Android布局管理器,Android常用高级控件,游戏与3D应用程序开发,网络与数据处理,手机特有Feature开发,传感器应用的开发,Android游戏开发实践...
《Android核心技术与实例详解》涵盖的主要内容Aridroid开发起步,Android布局管理器,Android常用高级控件,游戏与3D应用程序开发,网络与数据处理,手机特有Feature开发,传感器应用的开发,Android游戏开发实践...
Android进阶初级:组件Widget/ 菜单Menu/ 布局Layout 详解 Xml解析(Pull/Dom/Sax)/JNI 解析SQL数据库原理, SQLit e /SharedPreferences/File详解 多媒体Audio/Video/Camera 详解 Android进阶高级:蓝牙/WIFI SMS/...
1.5 更上一层楼——加入Android开发社区 1.6 本章小结 第2章 工欲善其事 必先利其器——搭建Android开发环境 2.1 开发Android应用前的准备 2.1.1 Android开发系统要求 2.1.2 Android软件开发包 2.1.3 其他注意事项 ...
1.5 更上一层楼——加入Android开发社区 1.6 本章小结 第2章 工欲善其事 必先利其器——搭建Android开发环境 2.1 开发Android应用前的准备 2.1.1 Android开发系统要求 2.1.2 Android软件开发包 2.1.3 其他注意事项 ...
1.5 更上一层楼——加入android开发社区 5 1.6 本章小结 6 第2章 工欲善其事 必先利其器——搭建android开发环境 7 2.1 开发android应用前的准备 7 2.1.1 android开发系统要求 7 2.1.2 android软件...
第4章 Android用户界面Android 用户界面,讲述了Android中的事件处理机制、布局管理和常用组件的使用。 第5章 Android基本程序单元ActivityAndroid 基本程序单元Activity,讲述了Android中重要组件Activity的...
主要介绍了 Android抽象布局——include、merge 、ViewStub详解,详细的介绍了三种布局各有的优势,有兴趣的同学可以参考一下。
【Android系统原理与开发要点详解】/底层 应用 框架 Android核心分析28篇,强烈推荐android初学者,android进阶者看看这个系列教程 Android应用开发者指南:性能优化 android开发教程合集(推荐新手看下这一季教程)...
《Android应用开发揭秘》全部实例源代码,配合《Android应用开发揭秘》使用 前言 第一部分 准备篇 第1章 Android开发简介 1.1 Android基本概念 1.1.1 Android简介 1.1.2 Android的系统构架 1.1.3 ...
第三篇 Android开发基础详解 第7章 常用控件 7.1 Button(按钮) 7.2 ImageButton(图片按钮) 7.3 ToggleButton(开关按钮) 7.4 TextView(文本视图) 7.5 ImageView(图片视图) 7.6 EditText(编辑框) 7.7 ...
1.5 更上一层楼——加入Android开发社区 1.6 本章小结 第2章 工欲善其事 必先利其器——搭建Android开发环境 2.1 开发Android应用前的准备 2.1.1 Android开发系统要求 2.1.2 Android软件开发包 2.1.3 其他注意事项 ...
2.3 创建第一个Android项目——HeUoAndroid 2.3.1 创建HelloAndroid项目 2.3.2 运行HelloAndroid及模拟器的使用 2.3.3 调试HelloAndroid 2.4 小结 第二部分 基础篇 第3章 Android程序设计基础 3.1 ...